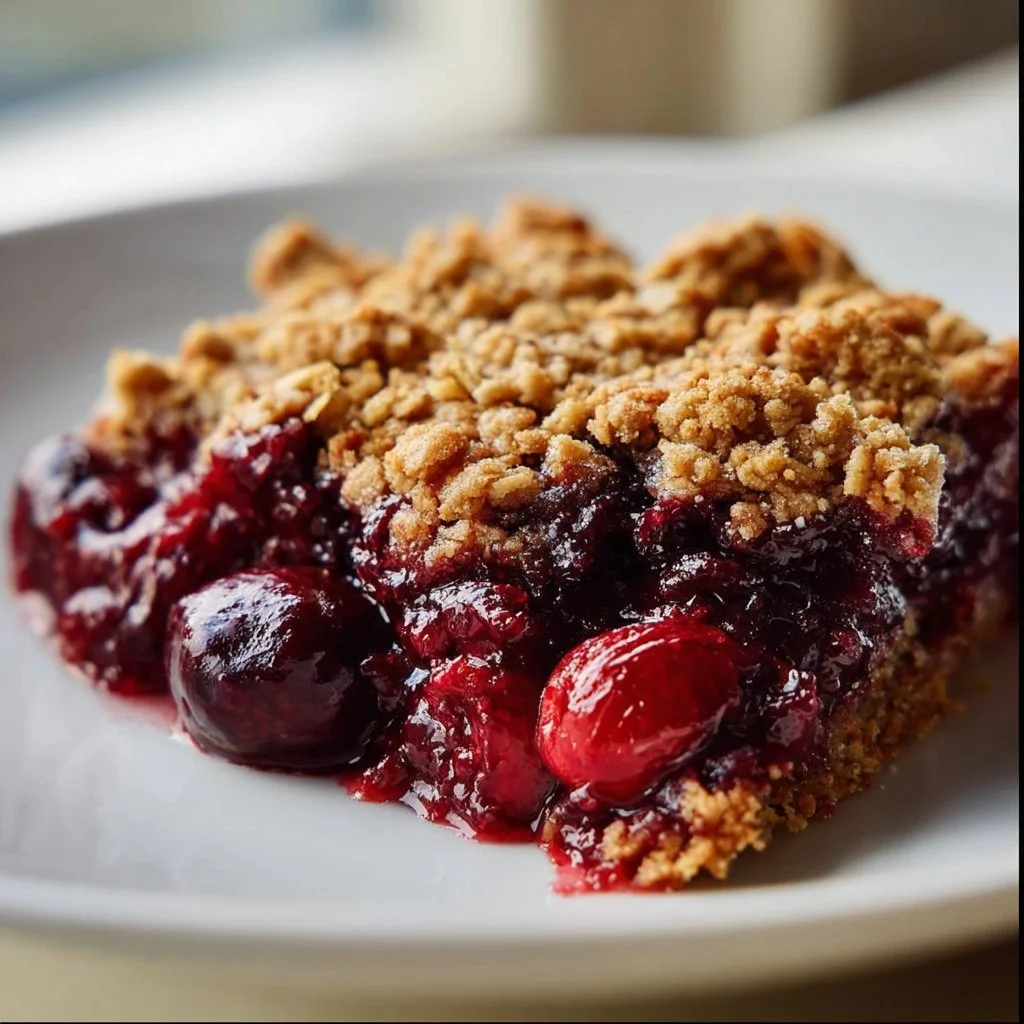
Sour Cherry Crisp is a delightful dessert that captures the essence of summer in every bite. With a sweet-tart cherry filling topped with a crunchy oat topping, this recipe promises to satisfy your cravings for something comforting and delicious. Read on to discover how easy it is to make this mouthwatering treat at home!

Why You’ll Love Sour Cherry Crisp:
- Easy to Make: This recipe is straightforward and requires no fancy techniques. Perfect for beginner bakers!
- Delicious Flavor: The combination of tart cherries and a sweet, crunchy topping creates a flavor explosion in your mouth.
- Versatile Dessert: Serve it warm with ice cream or cold for breakfast — it’s great any time of day!
- Customizable: You can add nuts, spices, or even swap in different fruits to suit your palate.
- Perfect for Gatherings: Whether it’s a family dinner or a potluck, this crisp is always a crowd-pleaser.
Prep & Cook Time Breakdown
- Prep Time: 15 minutes
- Cook Time: 25-30 minutes
- Total Time: Approximately 45 minutes
What You Need For Sour Cherry Crisp
- 2 cups sour cherries, pitted
- 1 cup oats
- 1/2 cup brown sugar
- 1/2 cup all-purpose flour
- 1/4 cup chopped nuts (e.g., walnuts or pecans)
- 1/2 tsp cinnamon
- 1/4 cup butter, melted
- 1/4 tsp salt
Step-by-Step: How to Make Sour Cherry Crisp
Directions Made Simple
- Preheat the Oven
- Preheat the oven to 350°F (175°C).
- Mix Dry Ingredients
- In a mixing bowl, combine the oats, brown sugar, flour, chopped nuts, cinnamon, and salt.
- Add Butter
- Pour in the melted butter and mix until crumbly.
- Prepare the Cherries
- Spread the sour cherries evenly in a baking dish.
- Add Topping
- Sprinkle the oat mixture over the cherries.
- Bake
- Bake for 25-30 minutes or until golden brown and bubbly.
- Cool
- Let cool slightly before serving.

Pro Tips to Perfect Sour Cherry Crisp
- Fresh vs. Frozen Cherries: If sour cherries are out of season, frozen cherries work well. Just thaw and drain excess liquid before using.
- Add More Spice: Try adding a pinch of nutmeg or ginger for extra warmth and depth of flavor.
- Butter Substitutes: For a dairy-free option, substitute coconut oil or a plant-based butter.
- Make Ahead: You can prepare the topping a day ahead and store it in the fridge. Just assemble and bake when ready!
- Use a Casserole Dish: A shallow dish will allow for more even cooking and crispiness on the topping.
How to Serve Sour Cherry Crisp
Sour Cherry Crisp is best served warm from the oven. For a delicious twist, serve it with a scoop of vanilla ice cream or a dollop of whipped cream. You can also pair it with yogurt for a delightful breakfast treat.
Storing Your Sour Cherry Crisp
- Room Temperature: Store leftovers in an airtight container at room temperature for up to 2 days.
- Refrigeration: For longer storage, you can keep it in the refrigerator for up to a week.
- Freezing: Freeze unbaked, prepared crisp by wrapping it tightly in plastic, then foil for up to 2 months. When ready to bake, simply add a few extra minutes to the baking time.
- Reheating: To reheat, warm individual portions in the microwave, or place the entire dish in a preheated oven at 350°F (175°C) until heated through.
- Covering: Always cover your crisp if storing in the fridge to prevent it from drying out.
Keys to Recipe Success
- Measure Accurately: Be precise with your measurements for best results.
- Don’t Overmix: Mix the topping just until crumbly to keep a nice texture.
- Quality Ingredients: Use fresh or high-quality frozen cherries for maximum flavor.
- Oven Temperature: Make sure your oven is fully preheated before baking for an even golden finish.
Flavor Twist Ideas
- Nut Variations: Swap out the walnuts or pecans for slivered almonds or hazelnuts for a different flavor profile.
- Add Citrus: A teaspoon of orange or lemon zest in the cherry mixture can brighten the flavors.
- Chocolate Drizzle: After baking, drizzle melted dark chocolate over the top for a decadent touch.
- Herbal Hint: Add a sprinkle of fresh basil or mint for a unique twist.
- Different Fruits: Experiment with other fruits such as blueberries, raspberries, or apples to create your perfect crisp!
Sour Cherry Crisp FAQ Guide
1. Can I use fresh cherries?
Yes! Fresh sour cherries are ideal for this recipe, but make sure to pit them first.
2. Is it possible to make this gluten-free?
Absolutely! Substitute gluten-free oats and flour to make this a gluten-free dessert.
3. Can I skip the nuts?
Yes, you can omit the nuts if you have allergies or prefer a nut-free dessert.
4. What should I serve with Sour Cherry Crisp?
This dessert pairs well with vanilla ice cream, whipped cream, or a yogurt topping.
Closing Remarks
Sour Cherry Crisp is a simple yet delicious dessert that everyone will love. With its blend of tart cherries and crunchy topping, it’s a treat for any occasion. Perfect for beginners and seasoned bakers alike, this recipe is sure to become a family favorite. Enjoy the comforting flavors and don’t hesitate to get creative with the ingredients. Happy baking!

Sour Cherry Crisp
Ingredients
Fruit Filling
- 2 cups sour cherries, pitted Fresh or frozen cherries can be used.
Oat Topping
- 1 cup oats Use rolled oats for best texture.
- 1/2 cup brown sugar Light or dark brown sugar may be used.
- 1/2 cup all-purpose flour Can substitute with gluten-free flour.
- 1/4 cup chopped nuts Walnuts or pecans are recommended.
- 1/2 teaspoon cinnamon Adds warmth to the topping.
- 1/4 cup butter, melted Can substitute with coconut oil for dairy-free.
- 1/4 teaspoon salt Enhances the flavors.
Instructions
Preparation
- Preheat the oven to 350°F (175°C).
- In a mixing bowl, combine the oats, brown sugar, flour, chopped nuts, cinnamon, and salt.
- Pour in the melted butter and mix until crumbly.
- Spread the sour cherries evenly in a baking dish.
- Sprinkle the oat mixture over the cherries.
Baking
- Bake for 25-30 minutes or until golden brown and bubbly.
- Let cool slightly before serving.