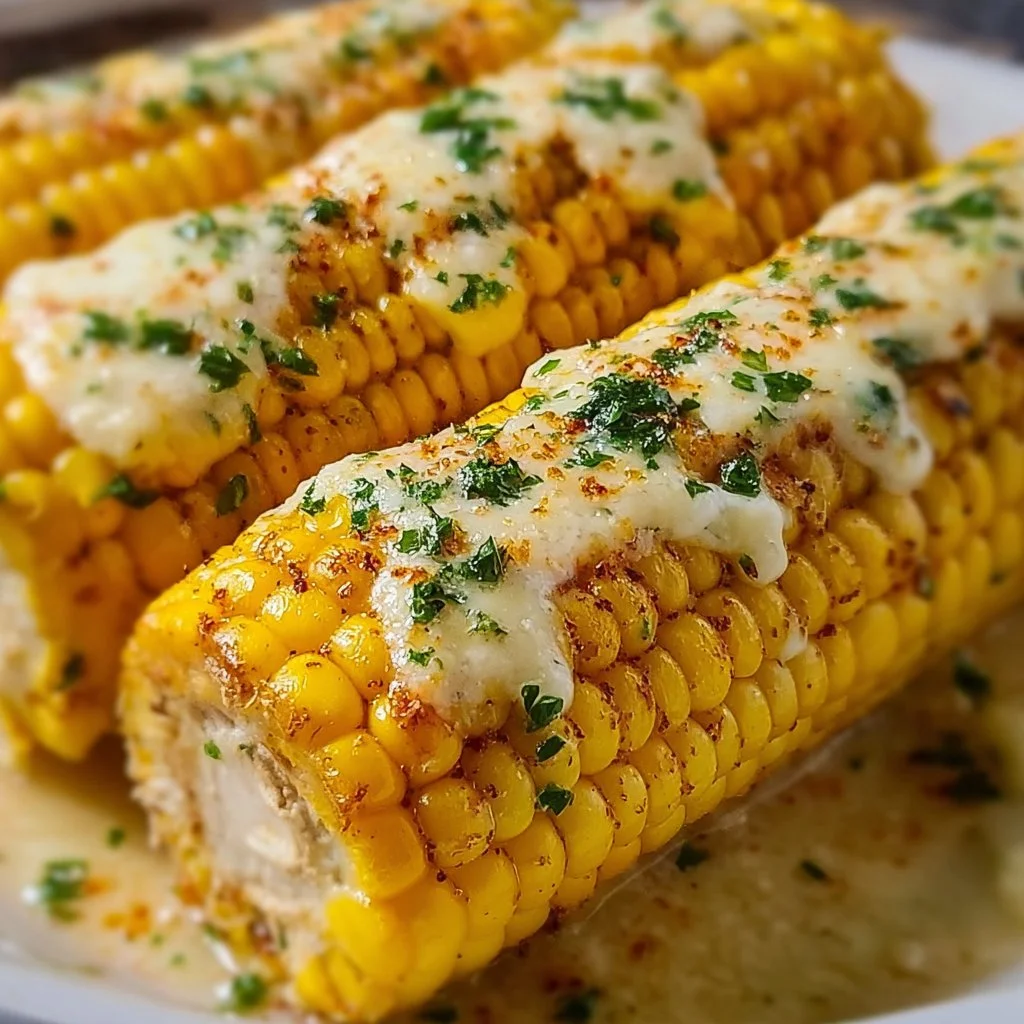
Looking for a delicious side dish to elevate your summer barbecue? Cheesy Garlic Butter Corn on the Cob is here to save the day! This recipe promises a delightful mix of buttery goodness, cheesy flavor, and a hint of garlic, making it a favorite for both kids and adults. Let’s dive into how you can make this irresistible dish at home!

Why You’ll Love Cheesy Garlic Butter Corn on the Cob:
-
Rich Flavor: The combination of garlic butter and cheese creates a mouthwatering blend that enhances the natural sweetness of corn.
-
Easy to Make: With just a few simple steps, this recipe is perfect for both beginners and seasoned cooks. Anyone can impress their family or guests!
-
Versatile: Whether you’re grilling for a summer cookout or roasting in your oven during winter, this corn dish fits every occasion.
-
Customizable: You can easily tweak the recipe by adding your favorite seasonings or cheese varieties to suit your taste.
-
Kid-Friendly: This dish is a great way to introduce kids to vegetables. The cheesy topping and buttery flavor will make them more likely to enjoy eating their greens!
Prep & Cook Time Breakdown
- Prep Time: 10 minutes
- Cook Time: 20 minutes
- Total Time: 30 minutes
What You Need For Cheesy Garlic Butter Corn on the Cob
- 4 ears of corn, husked
- 1/2 cup unsalted butter, melted
- 4 cloves garlic, minced
- 1 cup shredded cheese (cheddar or your choice)
- Salt and pepper to taste
- Chopped parsley for garnish (optional)
Step-by-Step: How to Make Cheesy Garlic Butter Corn on the Cob
Directions Made Simple
-
Preheat the Grill: Preheat your grill to medium-high heat. This ensures a perfect cook for your corn.
-
Prepare Garlic Butter: In a small bowl, combine melted butter and minced garlic. Stir well to mix them together.
-
Brush Corn: Generously brush the garlic butter mixture over each ear of corn. After that, season with salt and pepper to enhance the flavors.
-
Wrap the Corn: Wrap the corn in aluminum foil. This will help retain moisture and flavor while grilling.
-
Grill the Corn: Place the wrapped corn on the grill and cook for about 15-20 minutes. Don’t forget to turn it occasionally for even cooking!
-
Add Cheese: Carefully remove the corn from the foil and sprinkle with shredded cheese. Allow it to melt slightly while the corn is still warm.
-
Garnish and Serve: If desired, garnish with chopped parsley and serve warm to bring on that beautiful aroma!

Pro Tips to Perfect Cheesy Garlic Butter Corn on the Cob
-
Choose Fresh Corn: Always opt for fresh corn on the cob for the best flavor. Look for bright green husks and plump kernels.
-
Don’t Skip the Soak: For extra juiciness, consider soaking the corn in water for about 15 minutes before grilling. This helps steam it while it cooks.
-
Experiment with Cheeses: Try different cheeses like mozzarella, pepper jack, or even feta for unique flavors that elevate the dish.
-
Add Spice: If you like a kick, sprinkle some red pepper flakes or cayenne pepper onto your corn before grilling.
-
Use Butter Alternatives: For a healthier version, consider using olive oil instead of butter, or a dairy-free spread if you want to make it vegan-friendly.
How to Serve Cheesy Garlic Butter Corn on the Cob
Cheesy Garlic Butter Corn on the Cob is perfect as a side dish to any grilled meats, especially burgers, ribs, or chicken. Serve it alongside a fresh salad or coleslaw for the ultimate summer feast. Think about pairing it with a refreshing drink like lemonade or iced tea to complement the flavors.
Storing Your Cheesy Garlic Butter Corn on the Cob
-
Refrigerate Promptly: If you have leftovers, allow the corn to cool completely before storing it in the fridge.
-
Airtight Container: Place the corn in a sealed container or wrap it tightly in plastic wrap or aluminum foil.
-
Consume Within 3 Days: For the best flavor and quality, consume leftover corn within 3 days.
-
Reheat Gently: When reheating, do so in the microwave or on a grill as the oven can sometimes dry it out.
-
Avoid Freezing: While you can technically freeze it, the texture of the corn may change when thawed, so it’s best to enjoy fresh.
Keys to Recipe Success
-
Use Quality Ingredients: The fresher your corn and better the quality of your cheese and butter, the tastier the corn will be.
-
Watch Cooking Time: Keep an eye on the cooking time; overcooking can lead to mushy corn.
-
Tweak Seasonings: Don’t be afraid to adjust the salt and pepper to your liking—everyone has different taste preferences!
-
Make Ahead: You can prepare the garlic butter mixture in advance to save time on a busy day and make the process quicker.
Flavor Twist Ideas
-
Herb Infusion: Mix in herbs like thyme or rosemary with your garlic butter for a fragrant twist.
-
Sweet Corn Delight: Drizzle honey over the melted cheese for a sweet-savory combination.
-
BBQ Society: Add a dash of BBQ sauce over the grilled corn for a smoky flavor.
-
Bacon Bits: Mix in crispy bacon bits with your cheese for that perfect crunch and layer of flavor.
-
Citrus Zest: A sprinkle of lime or lemon zest before serving can brighten the taste and add a zesty kick.
Cheesy Garlic Butter Corn on the Cob FAQ Guide
-
Can I make it vegan? Yes! Use a plant-based butter alternative and dairy-free cheese.
-
How do I know when the corn is done? Check if the kernels are tender and slightly charred when you peel back the foil.
-
Can I cook it in the oven? Absolutely! Wrap the corn in foil and bake at 400°F for about 25-30 minutes.
-
What type of cheese works best? Cheddar, Monterey Jack, or even Parmesan can work wonderfully. Choose based on your preference!
Closing Remarks
Cheesy Garlic Butter Corn on the Cob is not only a quick and easy dish but also a flavorful addition to any meal. Its creamy, cheesy goodness will leave everyone asking for seconds. Give this recipe a try, and you might discover a new family favorite! Enjoy your cooking adventure and the smiles it brings to your table.

Cheesy Garlic Butter Corn on the Cob
Ingredients
Main ingredients
- 4 ears ears of corn, husked Choose fresh corn for the best flavor.
- 1/2 cup unsalted butter, melted Butter should be melted and combined with garlic.
- 4 cloves garlic, minced Freshly minced garlic works best.
- 1 cup shredded cheese (cheddar or your choice) Feel free to experiment with different cheese types.
- Salt and pepper to taste Adjust to personal preference.
- Chopped parsley for garnish (optional) Adds a nice touch when serving.
Instructions
Preparation
- Preheat your grill to medium-high heat.
- In a small bowl, combine melted butter and minced garlic. Stir well.
- Generously brush the garlic butter mixture over each ear of corn. Season with salt and pepper.
- Wrap each ear of corn in aluminum foil.
Cooking
- Place the wrapped corn on the grill and cook for about 15-20 minutes, turning occasionally.
- Carefully remove the corn from the foil and sprinkle with shredded cheese.
- Let the cheese melt slightly while the corn is still warm.
Serving
- Garnish with chopped parsley if desired and serve warm.