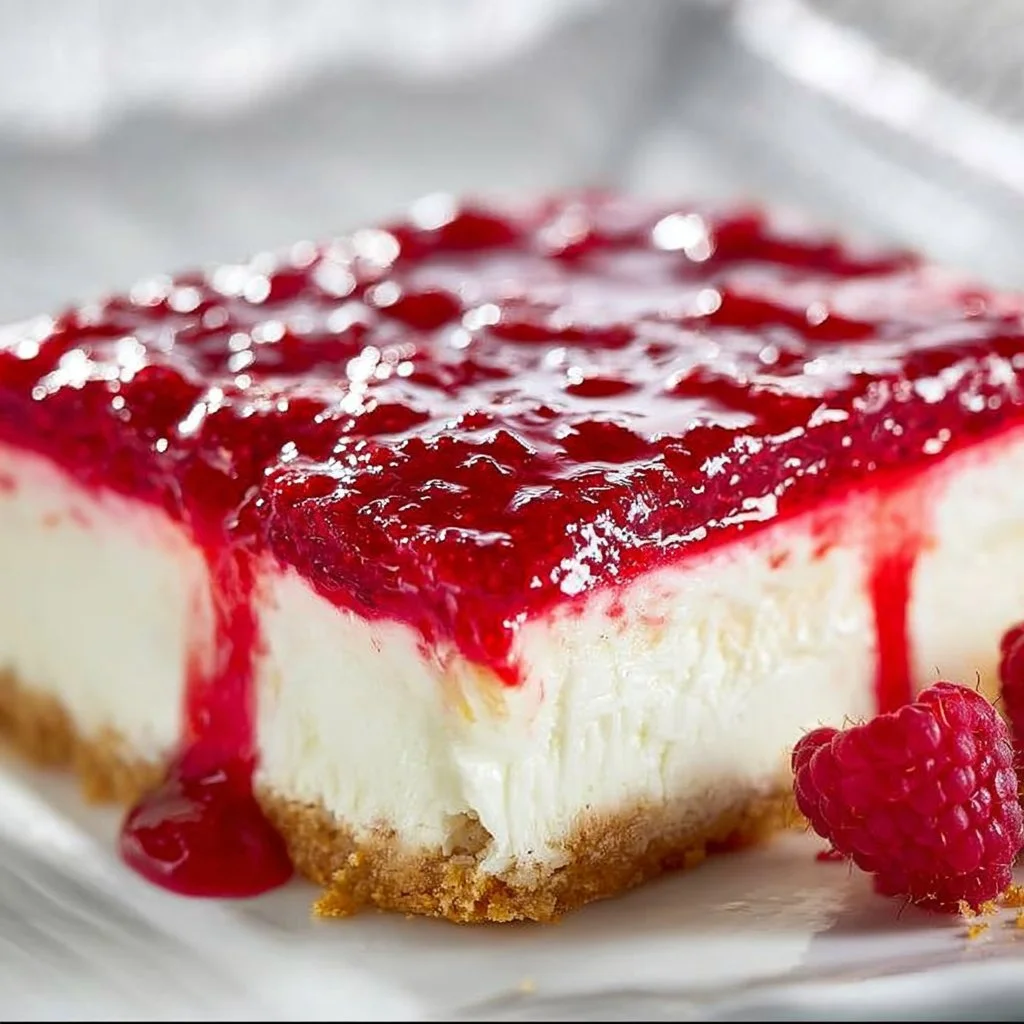
There’s something undeniably delightful about a slice of Dreamy Raspberry Cheesecake. This creamy and fruity dessert is perfect for any occasion, whether it’s a birthday celebration, a holiday feast, or simply a treat for yourself. If you’re looking for a sweet escape, this recipe promises to deliver a heavenly experience. Let’s dive into the details!

Time Breakdown
- Prep Time: 20 minutes
- Cook Time: 50 minutes
- Cooling Time: 5 hours (or overnight)
- Total Time: Approximately 6 hours and 10 minutes
Ingredients List for Dreamy Raspberry Cheesecake
- 1 1/2 cups graham cracker crumbs
- 1/4 cup sugar
- 1/2 cup unsalted butter, melted
- 2 cups cream cheese, softened
- 1 cup sugar
- 1 teaspoon vanilla extract
- 3 large eggs
- 1 cup fresh raspberries
- 1 cup sour cream
- 1/4 cup raspberry sauce (optional for topping)
How To Make Dreamy Raspberry Cheesecake Step-by-Step
1. Preheat the Oven
Preheat the oven to 325°F (160°C). Grease a 9-inch springform pan.
2. Prepare the Crust
In a bowl, mix graham cracker crumbs, 1/4 cup sugar, and melted butter until combined. Press the mixture firmly into the bottom of the pan to form a crust.
3. Make the Filling
In a large mixing bowl, beat the cream cheese until smooth. Gradually add 1 cup of sugar and vanilla extract, mixing until well combined.
4. Add Eggs
Add the eggs one at a time, beating well after each addition. Fold in the sour cream and gently mix until uniform.
5. Fold in Raspberries
Carefully fold in the raspberries into the cream cheese mixture.
6. Pour into the Pan
Pour the cheesecake batter over the crust in the springform pan.
7. Bake the Cheesecake
Bake for 45-50 minutes, until the edges are set but the center still has a slight jiggle.
8. Cool in Oven
Turn off the oven and let the cheesecake cool inside for 1 hour, then refrigerate for at least 4 hours or overnight.
9. Serve
Before serving, drizzle with raspberry sauce if desired.

4 Reasons Why You’ll Love Dreamy Raspberry Cheesecake
-
Perfect Balance of Flavors: The creamy cheesecake paired with tart raspberries creates a delightful contrast that everyone will love.
-
Easy to Make: With simple ingredients and straightforward steps, even beginners can whip up this delicious dessert.
-
Versatile for Occasions: Whether it’s a festive gathering or a quiet night at home, this cheesecake fits perfectly in any setting.
-
Visually Stunning: Its vibrant color and smooth texture make for an impressive dessert that you can proudly serve to guests.
Chef’s Notes & Pro Tips About Dreamy Raspberry Cheesecake
-
Use Room Temperature Ingredients: Ensure your cream cheese and eggs are at room temperature to get a smooth and creamy filling.
-
Don’t Overmix: Overmixing once you add the eggs can lead to cracks in the cheesecake. Mix just enough to combine.
-
Water Bath: For an ultra-smooth topping, consider baking the cheesecake in a water bath. Wrap the outside of the springform pan in aluminum foil to prevent leaks.
-
Chill: Letting the cheesecake chill overnight enhances its flavor and texture. Patience pays off!
-
Fresh Raspberries: Although frozen raspberries can work, nothing beats the taste and look of fresh raspberries in your cheesecake.
Serving Suggestions for Dreamy Raspberry Cheesecake
- Serve with a dollop of whipped cream on top for extra creaminess.
- Pair with a scoop of vanilla ice cream for a delightful contrast in temperature and flavor.
- Drizzle with chocolate sauce for a richer taste.
- Add mint leaves for a refreshing touch.
How To Storage Dreamy Raspberry Cheesecake
-
Refrigerate: Store any leftover cheesecake in the refrigerator in an airtight container to keep it fresh for up to 4 days.
-
Wrap and Freeze: For longer storage, wrap slices in plastic wrap and place them in a freezer-safe container. They can last for up to 2 months.
-
Thawing: Thaw frozen cheesecake in the refrigerator overnight for the best texture.
-
Avoid Temperature Changes: Try not to leave cheesecake out at room temperature for too long to prevent sogginess.
-
No Toppings: If you plan to store, consider adding any toppings just before serving for optimal freshness.
Tips For Success
-
Check for Doneness: The cheesecake is done when the edges look set, but the center has a slight jiggle. It will continue to set while cooling.
-
Room Temperature Ingredients: Using room temperature ingredients helps achieve a creamier consistency.
-
Don’t Rush Cooling: Let the cheesecake cool in the oven to prevent cracks caused by sudden temperature changes.
-
Piping Hot Water Bath: If using a water bath, ensure the water is hot before placing it in the oven for better results.
Flavor Variations
-
Chocolate Swirl: Add melted chocolate to the cream cheese mixture for a rich chocolate raspberry cheesecake.
-
Lemon Zest: Incorporate lemon zest into the filling for a refreshing twist.
-
Nutty Crust: Swap some of the graham cracker crumbs with finely crushed nuts for an added crunch.
-
Berry Medley: Replace the raspberries with a mix of strawberries and blueberries for a colorful berry cheesecake.
-
Spiced Flavor: Include a pinch of cinnamon or nutmeg into the filling for a warm, spiced taste.
FAQs About Dreamy Raspberry Cheesecake
-
Can I use frozen raspberries?
Yes, but fresh raspberries provide better texture and flavor. If using frozen, thaw and drain excess liquid. -
What can I do if my cheesecake cracks?
Cracks can be minimized by avoiding overmixing and cooling the cheesecake gradually. You can also cover cracks with toppings or fresh fruit. -
How can I tell when the cheesecake is done?
The edges should be set, while the center should jiggle slightly. A clean toothpick inserted into the edge can also indicate doneness. -
Can I make this cheesecake ahead of time?
Absolutely! You can make it 1-2 days in advance and store it in the refrigerator until serving.
Closing Notes
Dreamy Raspberry Cheesecake is not just a treat; it’s an experience that brings joy to any gathering. With its creamy texture and vibrant raspberry flavor, this cheesecake is sure to impress your family and friends. By following the simple steps outlined above, you may find that creating this decadent dessert is easier than you think! Enjoy every luscious bite, and don’t forget to share with loved ones. Happy baking!