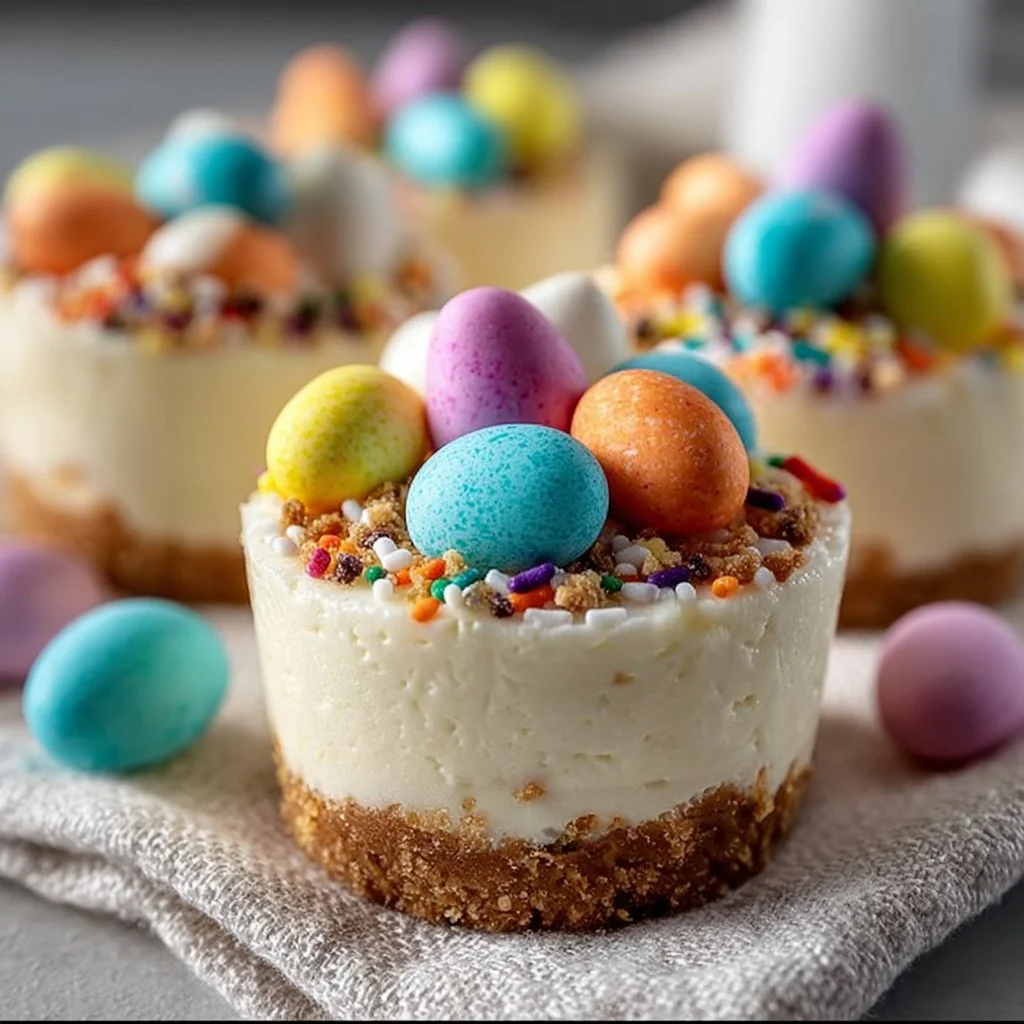
Easter No-Bake Mini Cheesecakes are the perfect treat for your holiday celebrations. These delightful desserts promise a creamy filling atop a crunchy crust, making them a favorite for both kids and adults alike. Get ready to discover how easy it is to make these charming mini cheesecakes!

Why You’ll Love Easter No-Bake Mini Cheesecakes
- No Oven Required: With no baking involved, these mini cheesecakes save you time and keep your kitchen cool.
- Easy to Customize: Dress them up with your favorite toppings and colors for a festive Easter flair.
- Perfect Portion Sizes: These mini cheesecakes are great for portion control, ideal for parties and gatherings.
- Make Ahead: They can be made a day in advance, allowing you to focus on other holiday preparations.
- Kid-Friendly: This recipe is simple enough for kids to help, making it a fun family activity.
Prep & Cook Time Breakdown
- Prep Time: 20 minutes
- Chill Time: 4 hours or overnight
- Total Time: 4 hours and 20 minutes
What You Need For Easter No-Bake Mini Cheesecakes
- 1 cup graham cracker crumbs
- 3 tbsp unsalted butter, melted
- 2 tbsp sugar
- 16 oz cream cheese, softened
- 1/2 cup powdered sugar
- 1 tsp vanilla extract
- 1 cup heavy whipping cream
- Assorted Easter sprinkles or decorative candies (optional)
Step-by-Step: How to Make Easter No-Bake Mini Cheesecakes
Directions Made Simple
1. Prepare the Crust
In a bowl, combine graham cracker crumbs, melted butter, and sugar. Mix well.
2. Press Crust Into Cups
Press the crumb mixture firmly into the bottom of mini cheesecake cups or a mini muffin pan lined with paper liners to form the crust.
3. Beat the Cream Cheese
In a separate large mixing bowl, beat the cream cheese until smooth and creamy.
4. Add Sugar and Vanilla
Add in powdered sugar and vanilla extract, and mix until well combined.
5. Whip the Cream
In another bowl, whip the heavy cream until stiff peaks form.
6. Combine Mixtures
Gently fold the whipped cream into the cream cheese mixture until light and fluffy.
7. Fill the Cups
Spoon or pipe the filling over the crusts in the mini cups.
8. Chill
Refrigerate the cheesecakes for at least 4 hours or overnight to set.
9. Add Toppings
Before serving, garnish with Easter sprinkles or decorative candies if desired.

Pro Tips to Perfect Easter No-Bake Mini Cheesecakes
- Use Room Temperature Ingredients: To achieve a smooth filling, make sure your cream cheese is at room temperature before mixing.
- Whip Cream Properly: Whip the heavy cream until stiff peaks form for a light and fluffy texture.
- Don’t Overmix the Cream: Be gentle when folding in the whipped cream to maintain its airy texture.
- Use a Piping Bag: If you want a more professional look, use a piping bag to fill the mini cups with the cheesecake mixture.
- Add a Base Layer: For a more complex flavor, add a layer of fruit puree at the bottom of the cups before the crust.
How to Serve Easter No-Bake Mini Cheesecakes
These adorable mini cheesecakes can be served straight from the fridge. They are perfect for an Easter brunch or as a sweet finish to your holiday dinner. Arrange them on a decorative platter, and don’t forget to sprinkle some extra Easter candies around for an eye-catching presentation!
Storing Your Easter No-Bake Mini Cheesecakes
- Refrigeration: Keep them stored in an airtight container in the refrigerator for up to 5 days.
- Freezing: These mini cheesecakes can be frozen for up to 2 months. Just make sure to wrap them tightly with plastic wrap.
- Thawing: To enjoy frozen cheesecakes, let them thaw in the fridge overnight before serving.
- Avoid Toppings Until Serving: Add toppings just before serving to keep them fresh and vibrant.
- Label Your Containers: If freezing, label your containers with the date for an easy reference.
Keys to Recipe Success
- Ingredient Quality: Always use high-quality cream cheese and fresh heavy whipping cream for the best flavor.
- Chilling Time: Patience is key; allow enough time for the mini cheesecakes to set in the fridge.
- Prepping Ahead: Prepare these the day before your event for a stress-free experience.
- Quality Sprinkles: Use colorful and fun Easter sprinkles to make your cheesecakes visually appealing.
Flavor Twist Ideas
- Chocolate Swirl: Add melted chocolate into the cream cheese mixture for a chocolatey version.
- Fruit Flavored: Mix in some lemon or raspberry puree for a fruity twist.
- Almond Extract: Substitute vanilla with almond extract for a unique flavor profile.
- Nut Crust: Replace graham cracker crumbs with crushed nuts for a gluten-free option.
- Colorful Layers: Alternate layers of cheesecake mixture with fruit purees for visual appeal.
Easter No-Bake Mini Cheesecakes FAQ Guide
1. Can I make these mini cheesecakes ahead of time?
Yes, they can be made a day in advance and stored in the fridge.
2. How long do they last in the fridge?
These mini cheesecakes can be kept in the refrigerator for up to 5 days.
3. Can I use a different crust?
Absolutely! You can substitute graham cracker crumbs with crushed cookies or gluten-free alternatives.
4. What can I use instead of heavy cream?
You can use whipped topping as a substitute if you prefer a lighter option.
Closing Remarks
Easter No-Bake Mini Cheesecakes are a delightful and easy dessert that everyone will love. With simple ingredients and straightforward steps, you can create these charming treats in no time. Perfect for family gatherings, they bring a touch of sweetness to your Easter celebrations. So gather your loved ones, get in the kitchen, and enjoy making these beautiful mini cheesecakes!

Easter No-Bake Mini Cheesecakes
Ingredients
For the Crust
- 1 cup graham cracker crumbs
- 3 tbsp unsalted butter, melted
- 2 tbsp sugar
For the Filling
- 16 oz cream cheese, softened Make sure it is at room temperature.
- 1/2 cup powdered sugar
- 1 tsp vanilla extract
- 1 cup heavy whipping cream Whipped to stiff peaks.
For Toppings
- Assorted Easter sprinkles or decorative candies Optional, for decoration.
Instructions
Prepare the Crust
- In a bowl, combine graham cracker crumbs, melted butter, and sugar. Mix well.
Press Crust Into Cups
- Press the crumb mixture firmly into the bottom of mini cheesecake cups or a mini muffin pan lined with paper liners to form the crust.
Beat the Cream Cheese
- In a separate large mixing bowl, beat the cream cheese until smooth and creamy.
Add Sugar and Vanilla
- Add in powdered sugar and vanilla extract, and mix until well combined.
Whip the Cream
- In another bowl, whip the heavy cream until stiff peaks form.
Combine Mixtures
- Gently fold the whipped cream into the cream cheese mixture until light and fluffy.
Fill the Cups
- Spoon or pipe the filling over the crusts in the mini cups.
Chill
- Refrigerate the cheesecakes for at least 4 hours or overnight to set.
Add Toppings
- Before serving, garnish with Easter sprinkles or decorative candies if desired.