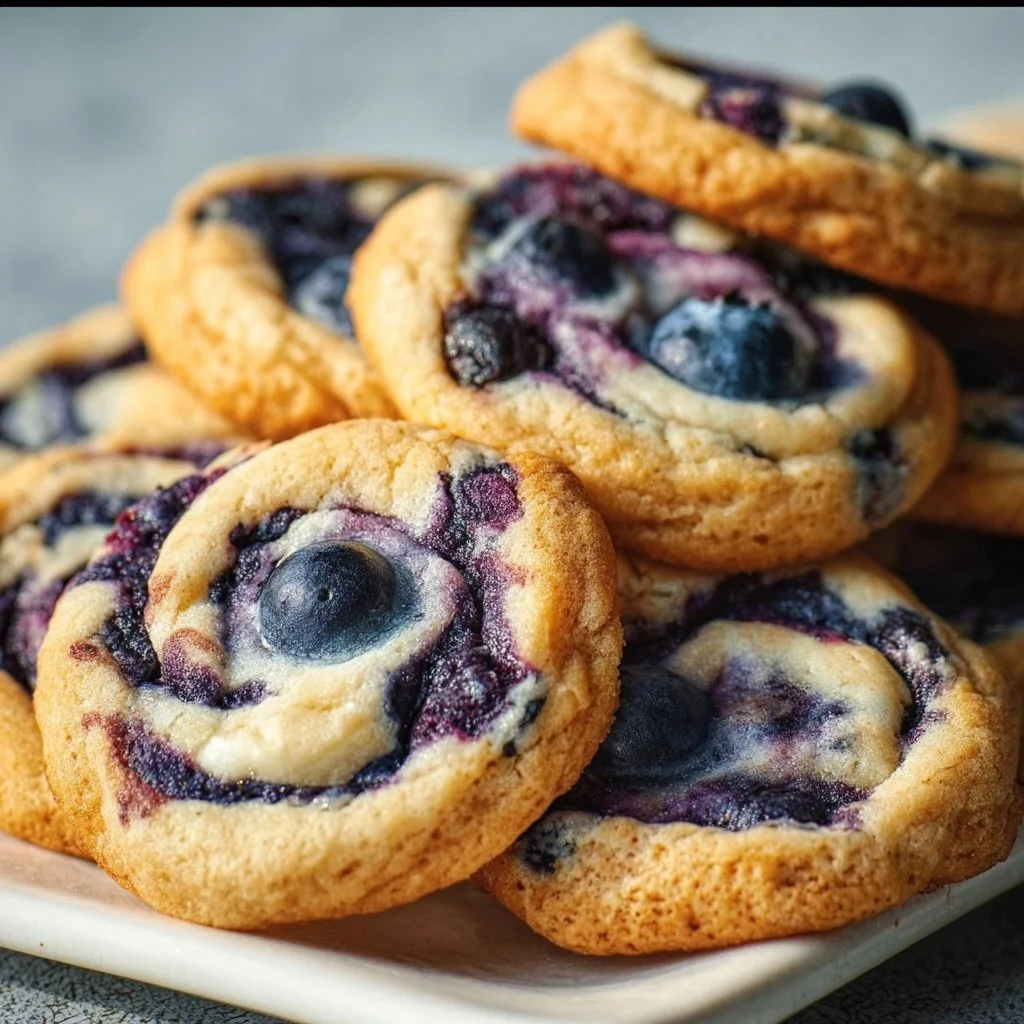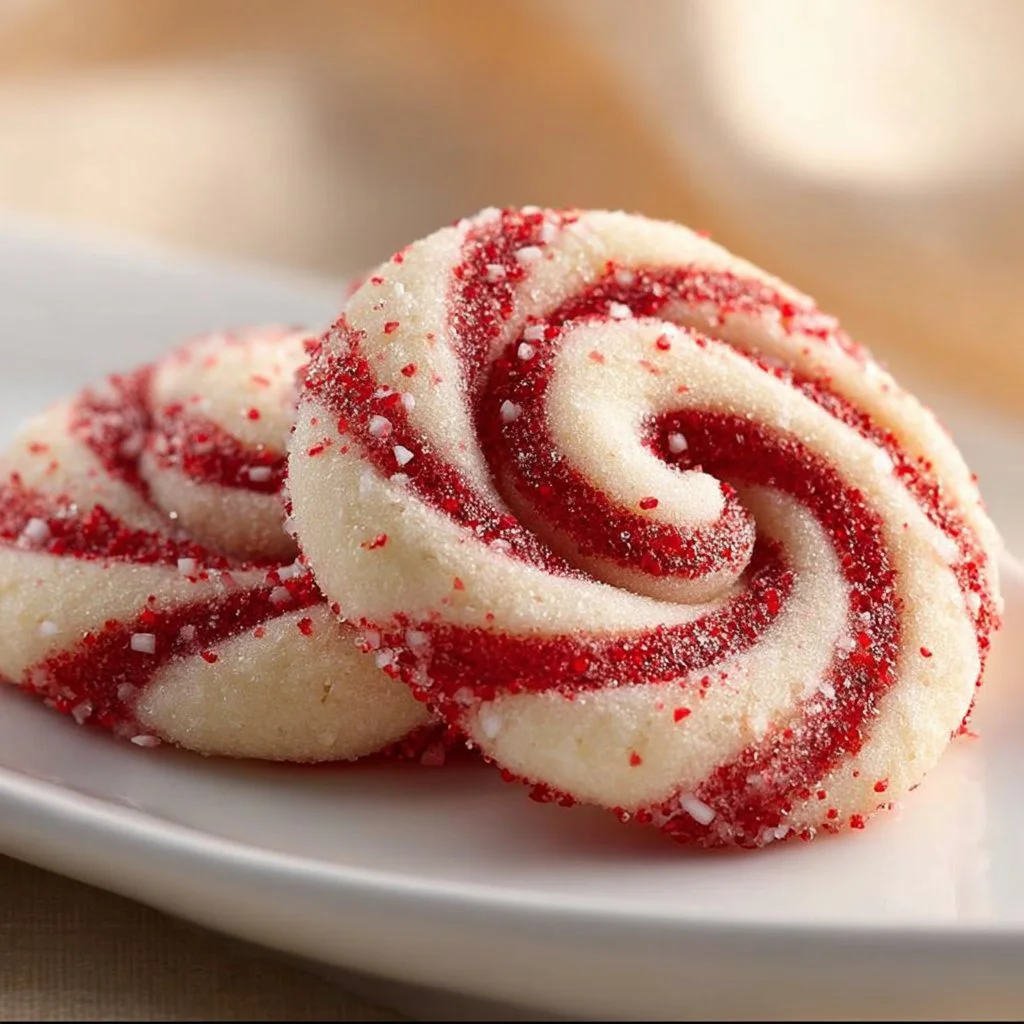
Peppermint Swirl Cookies are festive treats that combine the rich flavors of peppermint and buttery goodness, creating a perfect balance in each bite. These cookies promise a fun baking experience while delivering eye-catching swirls that are sure to impress your family and friends. Let’s dive into this delightful recipe that will make your holiday baking both joyous and delicious!
Table of Contents
Table of Contents
Prep & Cook Time Breakdown
- Prep Time: 30 minutes
- Chill Time: 2 hours
- Bake Time: 10 minutes
- Total Time: Approximately 2 hours and 40 minutes (including chilling)
Ingredients List For Peppermint Swirl Cookies
- 2 and 1/2 cups all-purpose flour
- 1 teaspoon baking powder
- 1/2 teaspoon salt
- 1 cup (2 sticks) unsalted butter, softened
- 1 cup granulated sugar
- 1 large egg
- 1 teaspoon vanilla extract
- 1 teaspoon peppermint extract
- Red gel food coloring
- 1/4 cup coarse sugar or crushed peppermint candies for coating
Peppermint Swirl Cookies Step-by-Step Instructions
1. Prepare the Dry Ingredients
In a medium bowl, whisk together the flour, baking powder, and salt. Set aside.
2. Cream the Butter and Sugar
In a large bowl, using an electric mixer, cream together the softened butter and granulated sugar until light and fluffy. Beat in the egg, then the vanilla extract and peppermint extract until well combined.
3. Combine Wet and Dry Ingredients
Gradually add the dry ingredients to the wet ingredients, mixing on low speed until just combined and a soft dough forms. Do not overmix.
4. Divide the Dough
Divide the dough in half. Leave one half plain. Add red gel food coloring to the second half, mixing until the color is uniform.
5. Chill the Dough
This is the key to sharp swirls: Wrap each ball of dough separately in plastic wrap and chill in the refrigerator for at least 30 minutes. This firms the dough, making it less sticky and easier to handle without the colors bleeding.
6. Roll out the Dough
Once chilled, on a lightly floured surface, roll out the plain dough into a 10×12 inch rectangle, about 1/4 inch thick. Repeat with the red dough, rolling it to the same size and thickness.
7. Layer the Dough
Carefully lay the red dough rectangle directly on top of the plain dough rectangle. Gently press them together.
8. Roll into a Log
Starting from one long side, carefully roll the layered dough tightly into a log. Press gently to eliminate air pockets as you roll. Ensure the log is consistently tight to prevent gaps and maintain the swirl definition.
9. Chill the Dough Log
Crucially, wrap the dough log tightly in plastic wrap and chill again in the refrigerator for at least 2 hours, or until very firm. This second chill prevents the dough from squishing when sliced, keeping your swirls perfectly intact.
10. Preheat Oven
Preheat your oven to 375 degrees F (190 degrees C). Line baking sheets with parchment paper.
11. Prepare for Baking
Remove the chilled dough log from the refrigerator. If desired, brush the log lightly with water or a whisked egg white, then roll it in the coarse sugar or crushed peppermint candies to coat evenly.
12. Slice the Cookies
Using a sharp knife, slice the log into 1/4 inch thick rounds. Place the sliced cookies about 1 inch apart on the prepared baking sheets.
13. Bake
Bake for 8 to 10 minutes, or until the edges are lightly golden. Do not overbake.
14. Cool
Let the cookies cool on the baking sheets for a few minutes before transferring them to a wire rack to cool completely.

Reasons You’ll Love Peppermint Swirl Cookies
- Festive Flavor: The delightful combination of peppermint and vanilla creates a refreshing taste that evokes holiday cheer.
- Visual Appeal: The beautiful red and white swirls not only taste good, but also serve as stunning decorations for your holiday cookie platter.
- Easy to Make: This simple, step-by-step recipe is beginner-friendly, making it perfect for budding bakers.
- Great for Sharing: These cookies are perfect for gifting or sharing at holiday parties and events, making them a crowd-pleaser.
- Customizable: You can easily make adjustments, like different colors or flavors, to suit your taste or occasion.
Easy Variations For Peppermint Swirl Cookies
- Chocolate Swirl: Substitute 1/2 cup of flour with cocoa powder for a chocolatey version of these cookies.
- Different Colors: Use different colors of gel food coloring for special occasions, such as green for St. Patrick’s Day.
- Nutty Addition: Incorporate chopped nuts, like pecans or walnuts, for added texture and flavor.
- Sprinkle Topping: Instead of coarse sugar, use festive sprinkles that match your occasion for a fun twist.
How To Serve Peppermint Swirl Cookies
Peppermint Swirl Cookies are delightful on their own, but you can elevate your serving game by presenting them on a festive platter. Pair them with hot cocoa or a cup of spiced tea to complement their peppermint flavor. For a fun and interactive way, set up a cookie bar during your holiday gatherings, where guests can decorate their cookies with icing and sprinkles.
How To Store Peppermint Swirl Cookies
- Keep Them Airtight: Store cookies in an airtight container at room temperature to maintain freshness.
- Layering with Parchment Paper: If stacking them, place parchment paper between layers to prevent sticking.
- Chill for Longevity: For longer storage, freeze the cookies in an airtight container for up to three months.
- Thaw Gently: Allow frozen cookies to thaw at room temperature before serving.
- Avoid Moisture: Keep cookies away from moisture to maintain their texture and taste.
Chef’s Notes & Pro Tips For Peppermint Swirl Cookies
- Dough Handling: If the dough becomes too soft while rolling, let it chill longer before proceeding.
- Uniform Thickness: Use rolling pins with thickness rings or guides to ensure even dough thickness.
- Check for Doneness: Keep an eye on the cookies as they bake; oven temperatures can vary, leading to different baking times.
- Experiment with Extracts: Try different extracts like almond or orange for a unique twist on flavor.
Expert Tips for Success with Peppermint Swirl Cookies
- Quality Ingredients: Use high-quality unsalted butter and pure extracts for the best flavor.
- Gel Food Coloring: A little goes a long way when using gel food coloring, so start with a small amount.
- Avoid Overmixing: Mix just until the ingredients are combined; overmixing can lead to tough cookies.
- Chill, Chill, Chill: Don’t skip the chilling steps; they are vital for maintaining the integrity of the cookie swirls.
Peppermint Swirl Cookies: Background & Cultural Inspiration
The practice of making colorful cookies during the holiday season is rooted in various cultural traditions that celebrate togetherness and joy. Over time, these cookies have evolved from simple holiday treats to a beloved culinary tradition, with countless adaptations blooming from the original recipes. Today’s Peppermint Swirl Cookies reflect not only festive spirit but also the love and creativity shared in kitchens everywhere every holiday season.
Peppermint Swirl Cookies: Frequently Asked Questions
- Can I make the dough ahead of time? Yes! You can prepare the dough and keep it chilled for up to 3 days before baking.
- Is it necessary to chill the dough? Absolutely! Chilling helps maintain the shape and swirls of the cookies when baking.
- Can I use other extracts instead of peppermint? Yes! Feel free to substitute with flavors like almond or vanilla for a new spin.
- How long will these cookies last? Stored in an airtight container, they will stay fresh for about a week at room temperature.
Wrap-Up Notes
Peppermint Swirl Cookies are not just a delicious treat; they are a symbol of the joy and creativity we share during the holiday season. With their stunning ribbons of color and delicious peppermint flavor, these cookies are sure to become a favorite in your holiday baking repertoire. Enjoy making these delightful cookies and share them with family and friends for a festive treat everyone will love! Happy baking!

Peppermint Swirl Cookies
Ingredients
Dry Ingredients
- 2.5 cups all-purpose flour
- 1 teaspoon baking powder
- 0.5 teaspoon salt
Wet Ingredients
- 1 cup unsalted butter, softened 2 sticks
- 1 cup granulated sugar
- 1 large egg
- 1 teaspoon vanilla extract
- 1 teaspoon peppermint extract
Coloring and Coating
- Red gel food coloring To achieve desired color
- 0.25 cups coarse sugar or crushed peppermint candies for coating Choose one
Instructions
Preparation
- In a medium bowl, whisk together the flour, baking powder, and salt. Set aside.
- In a large bowl, using an electric mixer, cream together the softened butter and granulated sugar until light and fluffy. Beat in the egg, then the vanilla extract and peppermint extract until well combined.
- Gradually add the dry ingredients to the wet ingredients, mixing on low speed until just combined and a soft dough forms. Do not overmix.
Dough Preparation
- Divide the dough in half. Leave one half plain. Add red gel food coloring to the second half, mixing until the color is uniform.
- Wrap each ball of dough separately in plastic wrap and chill in the refrigerator for at least 30 minutes.
Forming the Cookies
- On a lightly floured surface, roll out the plain dough into a 10×12 inch rectangle, about 1/4 inch thick. Repeat with the red dough.
- Carefully lay the red dough rectangle directly on top of the plain dough rectangle and gently press them together.
- Starting from one long side, carefully roll the layered dough tightly into a log.
- Wrap the dough log tightly in plastic wrap and chill again in the refrigerator for at least 2 hours.
Baking
- Preheat your oven to 375 degrees F (190 degrees C) and line baking sheets with parchment paper.
- Remove the chilled dough log from the refrigerator and brush lightly with water or whisked egg white, then roll in coarse sugar or crushed peppermint candies.
- Slice the log into 1/4 inch thick rounds and place them about 1 inch apart on the prepared baking sheets.
- Bake for 8 to 10 minutes, or until the edges are lightly golden.
- Let the cookies cool on the baking sheets for a few minutes before transferring to a wire rack.