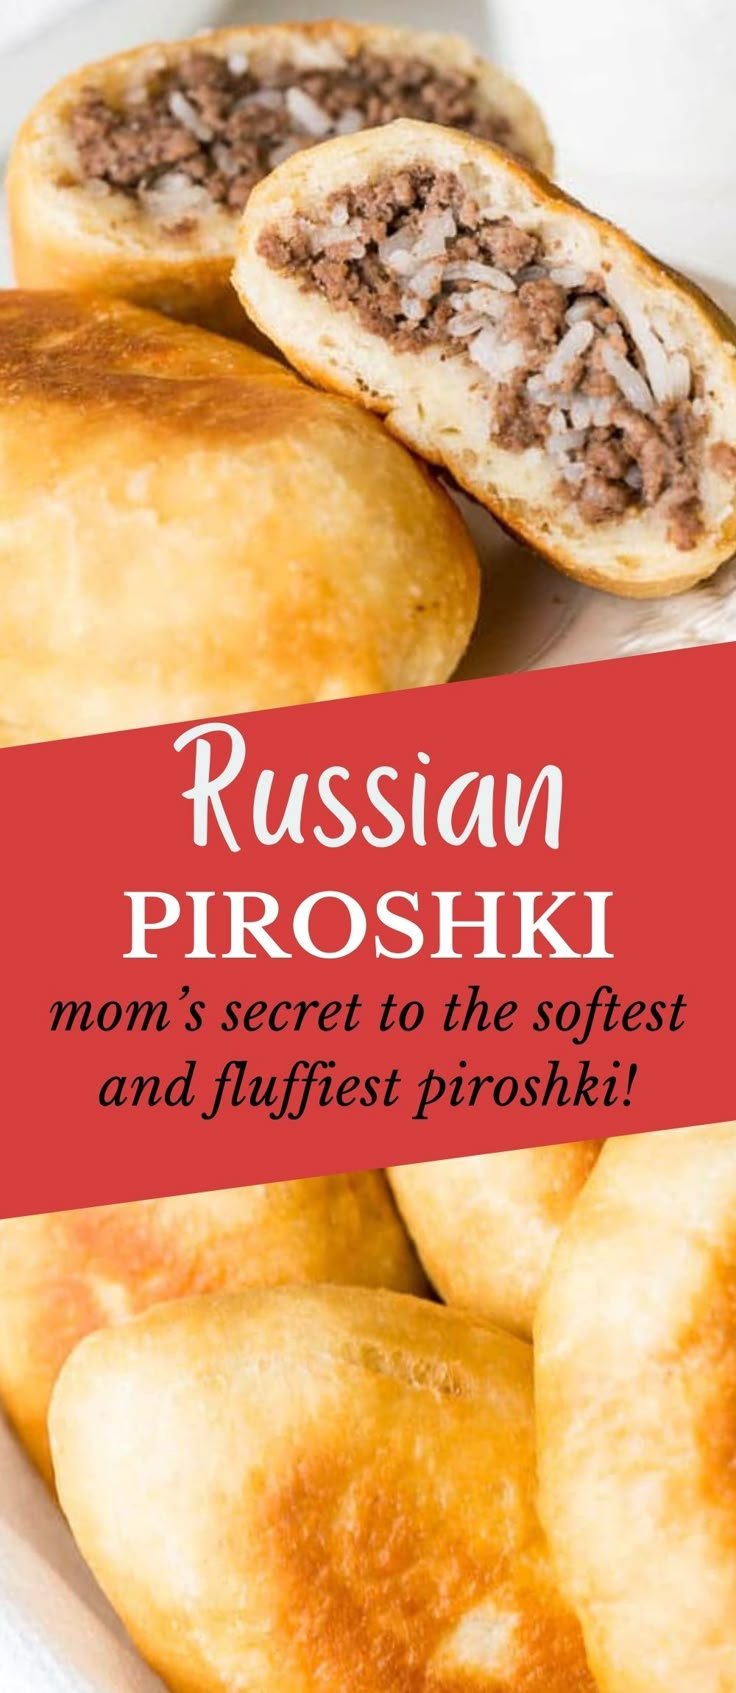
Russian Piroshki, or meat hand pies, are a delightful comfort food that brings warmth and satisfaction to any meal. Filled with savory beef and rice, these golden-brown pastries are not only easy to make but are also perfect for feeding a crowd or enjoying as a snack. With their flaky crust and hearty filling, it’s no wonder why this recipe is worth making.
Why You’ll Love Russian Piroshki
- Quick and Convenient: Perfect for busy days, these hand pies can be made ahead of time, making them an excellent choice for meal prep or snacks on the go.
- Comforting Flavor: The combination of seasoned beef, tender rice, and a crispy crust creates a comforting dish that feels like a warm hug.
- Customizable Options: You can easily adjust the filling to suit your preferences, whether you’re in the mood for more spices, veggies, or different proteins.
- Kid-Friendly: These hand pies are great for all ages. Kids love the fun shape and delicious flavor, and they’re an easy way to sneak in some nutrition.
- Great for Gatherings: Serve them at parties or potlucks, and they are sure to impress your guests, becoming a hit at any gathering.
Recipe Overview
- Prep Time: 30 minutes
- Cook Time: 20 minutes
- Total Time: 1 hour
- Servings: Approximately 12 piroshki
- Difficulty Level: Easy
Ingredients You’ll Need for Russian Piroshki
-
Dough:
- 2 cups all-purpose flour
- 1/2 cup water (warm)
- 1/4 cup milk
- 1/4 cup vegetable oil
- 1 packet (2 1/4 tsp) instant yeast
- 1/2 teaspoon sugar
- 1/2 teaspoon salt
-
Filling:
- 1 cup cooked beef, shredded or ground
- 1 cup cooked rice
- 1 onion, chopped
- Salt and pepper to taste
- Oil for frying
Each ingredient plays a vital role in the final product. The combination of flour, yeast, and liquids creates a light and flaky pastry, while the beef and rice provide a hearty and satisfying filling.
How to Make Russian Piroshki
-
Prepare the Yeast Mixture: In a bowl, combine warm water, milk, and sugar. Sprinkle the yeast over the surface and let it sit for about 5 minutes until it becomes foamy.
-
Make the Dough: In a separate bowl, mix the all-purpose flour and salt. Add the yeast mixture along with vegetable oil. Knead the dough until it is smooth and elastic, about 5-7 minutes.
-
Let it Rise: Cover the dough with a clean towel and let it rise in a warm place for 1 hour or until it has doubled in size.
-
Prepare the Filling: While the dough rises, heat a small amount of oil in a pan and cook the onion until it is softened. In a bowl, combine the cooked beef, rice, and sautéed onion. Season with salt and pepper to taste.
-
Shape the Piroshki: Once the dough has risen, punch it down and divide it into equal pieces. Roll each piece into a circle about 4 inches in diameter. Add a spoonful of the filling in the center, then fold the dough over and pinch the edges to seal.
-
Fry the Piroshki: Heat oil in a skillet over medium heat. Fry the piroshki in batches, cooking for about 3-4 minutes per side or until they are golden brown and cooked through.
-
Serve Warm: Enjoy the piroshki warm right out of the pan!
Tips for Success
- Kneading: Ensure you knead the dough sufficiently to develop gluten; this will help it achieve the right texture.
- Temperature Control: The water for the yeast should be warm but not too hot—as hot water can kill the yeast.
- Seal Properly: Make sure to seal the edges well to prevent the filling from leaking during frying.
- Oil Temperature: If the oil is too hot, the outside will cook too quickly while the inside remains cold. Aim for a medium heat for even cooking.
- Rest Period for Dough: If you find the dough is too elastic to roll out, let it rest for a few minutes before shaping to allow the gluten to relax.
Easy Variations
- Vegetarian Option: Replace the beef with a mixture of sautéed mushrooms, spinach, and cheese for a delicious meatless filling.
- Spicy Kick: Add a teaspoon of red pepper flakes to the meat mixture for some extra heat.
- Herb Flavors: Incorporate fresh herbs like dill or parsley into the filling for an aromatic twist.
- Breakfast Piroshki: Swap the beef for scrambled eggs and cooked sausage for a hearty breakfast version.
- Sweet Piroshki: Use a filling of sweetened fruit or jam for a dessert variation; simply alter the dough slightly by adding some sugar.
What to Serve with Russian Piroshki – with Mom’s secrets!
- Sour Cream: A dollop of sour cream enhances the flavor and adds creaminess.
- Pickled Vegetables: Serve piroshki with pickles for a tangy contrast that complements the richness.
- Cabbage Salad: A fresh cabbage or coleslaw salad balances the heaviness of the pies with a crunchy texture.
- Herbal Teas: Pairing these hand pies with a warm herbal tea makes the meal cozy and inviting.
- Borscht: Serve alongside this traditional beet soup for an authentic Eastern European meal.
Storage and Reheating
- Refrigerator Storage: Store leftover piroshki in an airtight container in the fridge for up to 3 days.
- Freezer Storage: If you need to keep them longer, freeze the uncooked piroshki on a baking sheet until firm, then transfer them to a freezer-safe bag. They can be cooked straight from frozen.
- Best Reheating Method: The best way to reheat is to bake them in a preheated oven at 350°F (175°C) for about 10-12 minutes, which helps restore their crunch.
- Meal Prep Note: Piroshki are great candidates for meal prep; prepare them in advance and freeze for quick meals during the week.
Common Mistakes to Avoid
- Not Allowing Proper Rise: Skipping the dough rising time will result in dense pastries. Patience is key!
- Overcrowding the Pan: Frying too many at once can lower the oil temperature, resulting in soggy piroshki.
- Sealing Ineffectively: If the edges are not sealed well, they can open during frying and spill out the filling.
- Using Cold Ingredients: Cold water or milk can hinder yeast activation; always use warm liquids.
- Underseasoning: Be generous with seasoning the filling; underseasoned piroshki can be bland.
Russian Piroshki: Background & Cultural Inspiration
Russian piroshki have a rich history rooted in Eastern European culinary traditions. Originally a peasant food, these hand pies were created to utilize leftover meats and grains. Families would prepare them in large batches, making them a common sight in Russian households. With each region having its own filling variations, piroshki is celebrated not only for their flavor but also for their versatility. This dish often appears during festive occasions, bringing families together around the table, sharing stories and laughter.
Frequently Asked Questions
Can I use all-purpose flour instead of bread flour?
Yes, you can use all-purpose flour, though bread flour may yield a chewier texture due to its higher protein content.
Can I prepare the dough ahead of time?
Absolutely! You can prepare the dough and keep it in the refrigerator for up to 24 hours before shaping and cooking the piroshki.
How do I know if the yeast is working?
Your yeast is good if it is frothy and bubbly after resting in warm water. This means it is active and ready to use.
What other fillings can I try?
Feel free to experiment with fillings like cheese and greens, lentils, or even sweet options such as apples and cinnamon for dessert piroshki.
Can I bake piroshki instead of frying?
Yes, you can bake them at 375°F (190°C) for about 20-25 minutes, brushing them with an egg wash for a golden finish.
Final Thoughts
This recipe for Russian Piroshki is not only a wonderful addition to your cooking repertoire but also a delightful way to share a piece of culture with family and friends. The flavors, textures, and ease of preparation make it a dish worth trying again and again. Whether it’s for a cozy dinner or a special gathering, these hand pies are sure to be a hit. Enjoy making piroshki and savoring the delicious results!