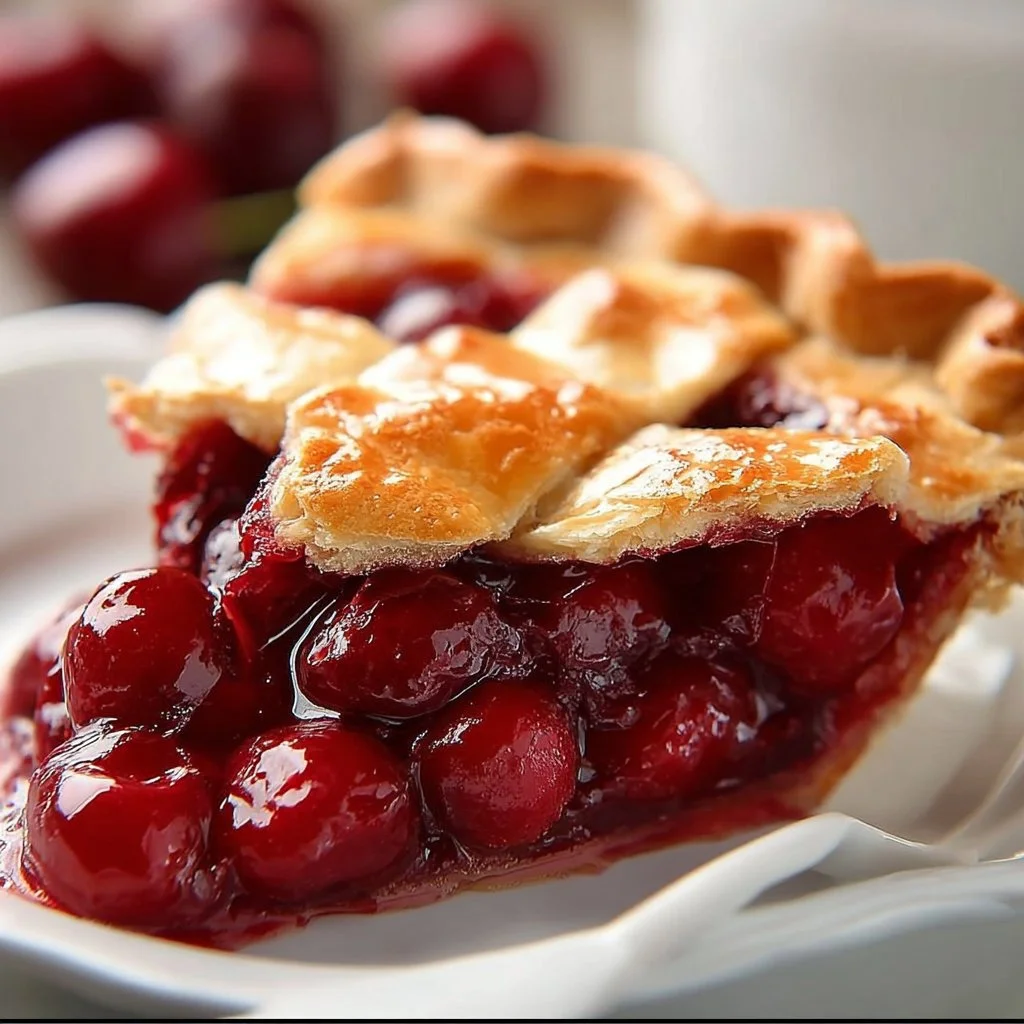
Juicy Cherry Pie is a delightful treat that brings warmth and joy to any occasion. The moment you take a bite, you’ll experience the burst of fresh cherries and the buttery crust, making it a perfect dessert to share with family and friends. Let’s dive into how easily you can create this scrumptious dessert at home!
Table of Contents
Table of Contents
Time Needed for This Recipe
Preparing Juicy Cherry Pie will take you about 20 minutes, with an additional 35 minutes for baking. In total, you can have this delicious pie ready in just under an hour!
Ingredients List For Juicy Cherry Pie
- 2 cups fresh cherries, pitted
- 1 cup granulated sugar
- 2 tablespoons cornstarch
- 1 tablespoon lemon juice
- 1 teaspoon vanilla extract
- 1 tablespoon butter
- 1 pre-made pie crust (top and bottom)
- 1 egg (for egg wash)
- 1 tablespoon milk (for egg wash)
Juicy Cherry Pie Step-by-Step Instructions
1. Preheat the Oven
Preheat the oven to 425°F (220°C).
2. Prepare the Cherry Filling
In a large bowl, combine the pitted cherries, sugar, cornstarch, lemon juice, and vanilla extract. Stir until the cherries are well coated.
3. Roll Out the Bottom Crust
Roll out the bottom pie crust and place it in a pie dish. Pour the cherry mixture into the crust and dot with butter.
4. Add the Top Crust
Roll out the top crust, place it over the filling, and seal the edges. Cut slits in the top crust for steam to escape.
5. Apply Egg Wash
Mix the egg and milk together and brush the mixture over the top crust for a golden finish.
6. Bake the Pie
Bake in the preheated oven for 30-35 minutes, or until the crust is golden brown and the filling is bubbly.
7. Cool Before Serving
Allow cooling before serving.

Reasons You’ll Love Juicy Cherry Pie
- Bursting with Flavor: The natural sweetness of cherries paired with a hint of lemon creates an unforgettable taste.
- Easy to Make: With a few simple ingredients, anyone can whip up this delicious pie.
- Perfect for Gatherings: This pie is a crowd-pleaser that makes any gathering feel special.
- Versatile Dessert: Serve it warm with ice cream, or enjoy it chilled. It’s delightful either way!
- Summer Fruit Delight: Fresh cherries are in season during the summer, making this pie perfect for those sunny days.
Easy Variations For Juicy Cherry Pie
- Mixed Berry Pie: Add strawberries or blueberries to the cherry filling for a mixed berry delight.
- Almond Extract: Substitute vanilla extract with almond extract for a different flavor twist.
- Crumb Topping: Instead of a top crust, sprinkle a crumb topping made of flour, sugar, and butter for added texture.
- Chocolate Cherries: Stir in chocolate chips for a decadent dessert.
- Single Crust Version: Make it a deep-dish pie with just one crust on top and serve it a la mode.
How To Serve Juicy Cherry Pie
Juicy Cherry Pie is best served warm, straight from the oven, or at room temperature. Pair it with a scoop of vanilla ice cream or a dollop of freshly whipped cream for an extra touch of indulgence. For a more festive touch, sprinkle powdered sugar on top just before serving.
How To Store Juicy Cherry Pie
- Room Temperature: Store the pie at room temperature for up to 2 days covered with a clean kitchen towel.
- Refrigeration: Keep it in the fridge for up to a week in an airtight container.
- Freezing: You can freeze unbaked pie for several months. Wrap it well in plastic wrap and aluminum foil.
- Thaw Before Baking: If frozen, allow the pie to thaw in the fridge overnight before baking.
- Cover: Protect the pie from absorbing other odors by covering it or storing it in a tight container.
Chef’s Notes & Pro Tips For Juicy Cherry Pie
- Pitting Cherries: Use a cherry pitter to save time and effort when preparing your cherries.
- Sugar Adjustment: Adjust the sugar level according to the sweetness of your cherries.
- Finding Fresh Cherries: Opt for in-season cherries for the best flavor and freshness.
- Chilling the Crust: Chill your pie crust for at least 30 minutes before baking for a flakier crust.
Expert Tips for Success with Juicy Cherry Pie
- Watch the Baking Time: Keep an eye on the pie. Sometimes ovens bake differently, so check for a golden crust.
- Let it Rest: Allow the pie to cool for at least an hour to help the filling set properly.
- Use a Baking Sheet: Place a baking sheet on the rack below the pie to catch any potential drips.
- Experiment with Spices: Try adding a pinch of cinnamon or nutmeg for a warm spice flavor.
Juicy Cherry Pie: Background & Cultural Inspiration
(1) The roots of cherry pie can be traced back to early American settlers who made use of the cherry trees thriving in their orchards.
(2) Over time, it has evolved into a beloved dessert, showcasing regional cherries and often crafted using modern conveniences like pre-made crusts.
This Juicy Cherry Pie remains meaningful today as it continues to bring families together and evoke sweet memories with every slice shared.
Juicy Cherry Pie: Frequently Asked Questions
- Can I use frozen cherries? Yes, frozen cherries can be used, but ensure to thaw and drain them before mixing.
- How do I know when the pie is done? The pie is done when the crust is golden brown, and the filling is bubbling through the slits in the crust.
- Can I make this pie ahead of time? Absolutely! You can make it a day in advance; just reheat it before serving.
- What’s the best way to prevent a soggy crust? Ensure the filling isn’t overly watery and bake the pie until it’s fully cooked.
Wrap-Up Notes
Juicy Cherry Pie is a cherished dessert that captures the essence of homemade goodness. Its simple ingredients and easy preparation make it accessible for everyone, whether you’re a seasoned baker or a novice in the kitchen. With its delightful flavors, this pie can elevate any meal or celebration, leaving fond memories in every bite. So roll up your sleeves and enjoy making this classic treat!

Juicy Cherry Pie
Ingredients
Cherry Filling
- 2 cups fresh cherries, pitted
- 1 cup granulated sugar Adjust based on sweetness of cherries.
- 2 tablespoons cornstarch For thickening.
- 1 tablespoon lemon juice To enhance cherry flavor.
- 1 teaspoon vanilla extract For flavor.
- 1 tablespoon butter For dotting on filling.
Crust
- 1 pre-made pie crust (top and bottom) Can use store-bought for convenience.
- 1 egg for egg wash For a golden finish.
- 1 tablespoon milk For egg wash.
Instructions
Preparation
- Preheat the oven to 425°F (220°C).
- In a large bowl, combine pitted cherries, sugar, cornstarch, lemon juice, and vanilla extract. Stir until cherries are well coated.
- Roll out the bottom pie crust and place it in a pie dish. Pour the cherry mixture into the crust and dot with butter.
- Roll out the top crust, place it over the filling, and seal the edges. Cut slits in the top crust for steam to escape.
- Mix the egg and milk together and brush the mixture over the top crust for a golden finish.
Baking
- Bake in the preheated oven for 30-35 minutes, or until the crust is golden brown and the filling is bubbly.
- Allow cooling before serving.