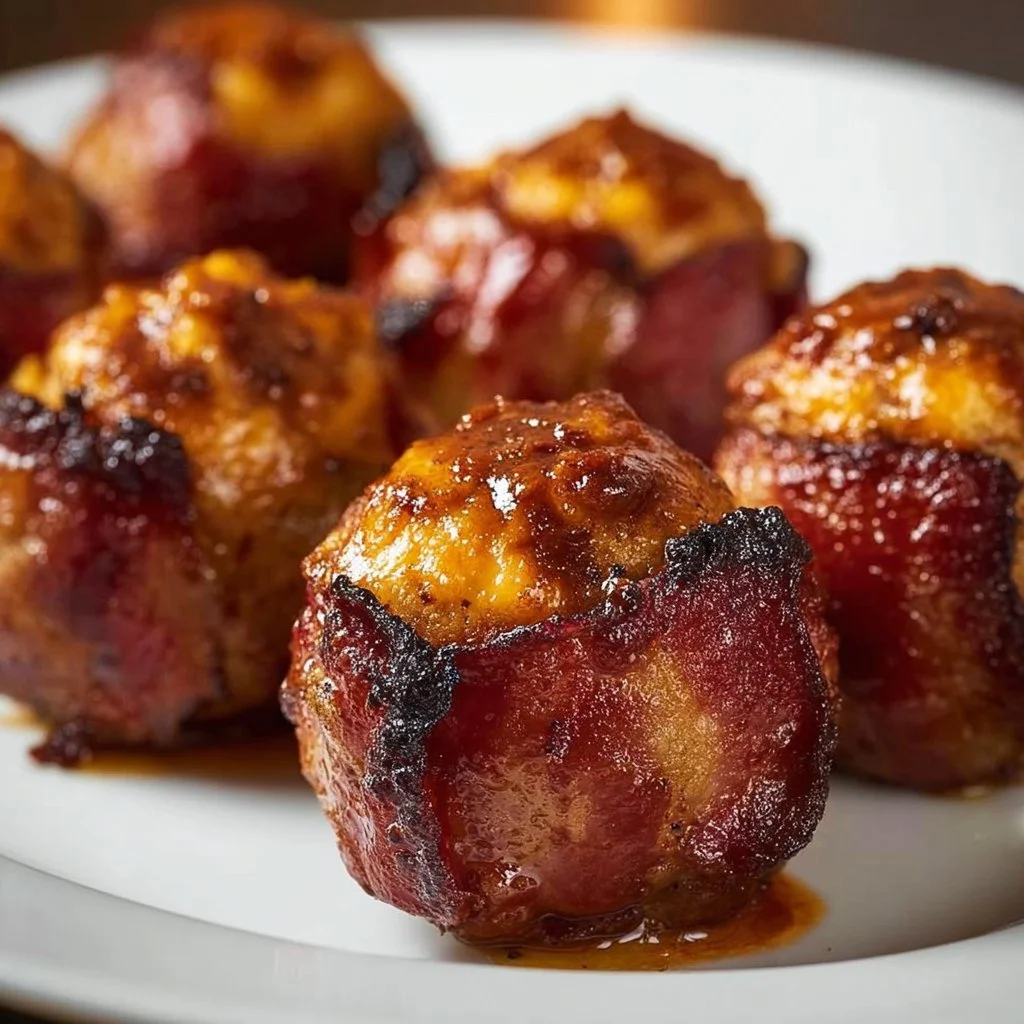
Are you ready to take your snacking game to the next level? Cheddar-Stuffed BBQ Bacon Bombs are the ultimate indulgence for anyone who loves gooey cheese, smoky bacon, and the rich flavor of barbecue. Trust us, you won’t want to miss out on making these delightful bites that are perfect for gatherings, game days, or simply a treat for yourself.
Table of Contents
Table of Contents
Why You’ll Love Cheddar-Stuffed BBQ Bacon Bombs
- Irresistible Flavor Combination
- Cheddar-Stuffed BBQ Bacon Bombs pack a punch with their savory blend of ingredients. The combination of juicy meat, melted cheese, and smoky bacon makes for a flavor explosion that is hard to resist.
- Easy to Make
- This recipe is beginner-friendly. With simple steps and readily available ingredients, even novice cooks can impress their family and friends with these delicious bites.
- Versatile Snack
- Whether it’s game day, a party, or just a cozy night in, these bombs fit the bill for any occasion. They are the kind of finger food that brings people together.
- Customizable Ingredients
- You can easily tweak the recipe to match your taste. Add spices, switch out the cheese, or try different sauces to make Cheddar-Stuffed BBQ Bacon Bombs uniquely yours.
Time Breakdown
- Preparation Time: 20 minutes
- Cooking Time: 20-25 minutes
- Total Time: 45-50 minutes
Ingredients List for Cheddar-Stuffed BBQ Bacon Bombs
- 1 pound of ground beef
- 8 ounces of cheddar cheese, cubed
- 8 strips of bacon
- ½ cup of barbecue sauce
- 1 teaspoon of garlic powder
- 1 teaspoon of onion powder
- 1 teaspoon of smoked paprika
- Salt and pepper to taste
How To Make Cheddar-Stuffed BBQ Bacon Bombs Step-by-Step
Step 1: Prepare Ingredients
Start by gathering all your ingredients. It’s essential to have everything ready to go to make the cooking process smoother.
Step 2: Preheat the Oven
Preheat your oven to 375°F (190°C). This ensures that the bacon gets crispy and the cheese is perfectly melted.
Step 3: Season the Meat
In a large bowl, add the ground beef, garlic powder, onion powder, smoked paprika, salt, and pepper. Mix well until all the seasonings are combined.
Step 4: Form the Meat Mixture
Take a handful of the seasoned ground beef and flatten it in the palm of your hand. You want it to be about ¼ inch thick.
Step 5: Add Cheese
Place a cube of cheddar cheese in the center of the flattened beef patty.
Step 6: Wrap the Cheese
Carefully fold the beef around the cheese, ensuring it’s fully enclosed. Shape it into a ball.
Step 7: Prepare the Bacon
Wrap each beef ball with a strip of bacon. You can secure the bacon with a toothpick if necessary, making sure to cover all sides.
Step 8: Bake the BBQ Bacon Bombs
Place the bacon-wrapped balls on a baking sheet lined with parchment paper. Bake in the preheated oven for about 20-25 minutes or until the bacon is crispy.
Step 9: Add BBQ Sauce
In the last few minutes of cooking, brush your favorite barbecue sauce over each bomb. Return them to the oven for another 5 minutes.
Step 10: Let Them Rest
Once done, take them out of the oven and let them rest for a few minutes before serving. This allows the cheese to settle, making them easier to eat.

Chef’s Notes & Pro Tips About Cheddar-Stuffed BBQ Bacon Bombs
- Use Quality Bacon
- Opt for thick-cut bacon for richer flavor and better texture.
- Experiment with Cheese
- Try substituting cheddar with pepper jack, mozzarella, or your favorite cheese blend for a unique twist.
- Spice It Up
- Kick up the heat by adding chopped jalapeños or a dash of hot sauce to the meat mixture.
- Check Cooking Temperature
- Ensure the internal temperature of the meatballs reaches 160°F (70°C) for safe consumption.
- Resting Time is Key
- Letting the bombs rest helps prevent cheesy explosions when you take a bite.
Serving Suggestions for Cheddar-Stuffed BBQ Bacon Bombs
- With Extra BBQ Sauce
- Serve with additional barbecue sauce on the side for the perfect dipping experience.
- Accompanied by Veggies
- Pair your bacon bombs with a fresh vegetable platter for some contrast. Carrot and celery sticks with ranch dressing add crunch.
- Sliders
- Transform these bombs into sliders by placing them in mini buns. Add pickles and onion for extra flavor.
- Garnish
- Top with chopped green onions or cilantro for an added touch of freshness.
How To Store Cheddar-Stuffed BBQ Bacon Bombs
- Cool Completely
- Before storing, ensure the bacon bombs are completely cooled to room temperature to prevent sogginess.
- Use Airtight Containers
- Store them in airtight containers to keep them fresh longer.
- Refrigerate
- These can be kept in the fridge for up to 3 days.
- Freeze for Later
- For longer storage, freeze the cooked bombs. They can last up to 2 months in the freezer.
- Reheat Safely
- When ready to eat, reheat in the oven at 350°F (175°C) until warmed through for a crispy texture.
Tips For Success
- Don’t Overstuff
- Avoid overstuffing the bacon bombs with cheese, as it might ooze out during cooking.
- Work in Batches
- If your baking sheet is small, cook in batches to ensure even cooking.
- Watch the Time
- Keep an eye on the cooking time as ovens vary; you want perfect crispy bacon without burning.
- Be Careful with Hot Cheese
- Let the bombs cool slightly before biting into them. The cheese can be surprisingly hot!
Flavor Variations
- Buffalo Chicken Style
- Substitute the ground beef with shredded cooked chicken and add buffalo sauce for a spicy kick.
- BBQ Pulled Pork
- Mix pulled pork instead of beef for a smoky barbecue version.
- Meat Lover’s
- Combine ground beef with sausage or turkey for a hearty, meaty flavor.
- Cheesy Spinach Bacon Bombs
- Incorporate cooked spinach into the cheese mixture for an extra veggie boost.
FAQs About Cheddar-Stuffed BBQ Bacon Bombs
- Can I make Cheddar-Stuffed BBQ Bacon Bombs ahead of time?
- Yes! You can prepare them the day before and store them in the fridge until you’re ready to bake.
- Is it possible to cook these on a grill?
- Absolutely! You can grill them over indirect heat for a smoky flavor. Just make sure the internal temperature is safe.
- Can I use turkey or chicken instead of beef?
- Yes, ground turkey or chicken can be used, although they may not have the same level of flavor.
- What should I serve with these bomb snacks?
- Pair them with coleslaw, potato salad, or baked beans for a complete meal.
Closing Notes
Cheddar-Stuffed BBQ Bacon Bombs are not just your ordinary snacks; they’re an experience every food lover must try. With their delightful blend of flavors, these bites are sure to impress anyone who takes a bite. Whether you’re hosting a party or enjoying a quiet night on the couch, these bombs are a guaranteed crowd-pleaser. So don your apron and get ready to enjoy a taste sensation that will leave everyone wanting more!

Cheddar-Stuffed BBQ Bacon Bombs
Ingredients
Meat and Cheese
- 1 pound ground beef
- 8 ounces cheddar cheese, cubed Feel free to experiment with other cheeses.
Bacon and Sauce
- 8 strips bacon Opt for thick-cut for more flavor.
- ½ cup barbecue sauce Your choice of BBQ sauce.
Seasonings
- 1 teaspoon garlic powder
- 1 teaspoon onion powder
- 1 teaspoon smoked paprika
- Salt and pepper to taste
Instructions
Preparation
- Gather all your ingredients to make the cooking process smoother.
- Preheat your oven to 375°F (190°C).
Mix and Form Bombs
- In a large bowl, combine ground beef, garlic powder, onion powder, smoked paprika, salt, and pepper. Mix well.
- Flatten a handful of the seasoned beef into a patty about ¼ inch thick.
- Place a cube of cheddar cheese in the center of the patty and wrap the beef around it, shaping it into a ball.
Wrap and Bake
- Wrap each beef ball with a strip of bacon, securing with a toothpick if necessary.
- Place the bacon-wrapped balls on a baking sheet lined with parchment paper.
- Bake for 20-25 minutes or until the bacon is crispy.
- In the last few minutes of cooking, brush BBQ sauce over each bomb and return to the oven for another 5 minutes.
- Remove from the oven and let them rest for a few minutes before serving.